In this guide
Have a question?
Ask our AI assistantBy now, we recommend that you have created a few published testimonials. In this guide, we’ll look at the different ways you can show your testimonials on your website.
The default testimonials page is automatically created for you, and is the quickest method for displaying your projects on your site. The instructions below will show you how to find the link to your portfolio page.
Select the appropriate tab below based on which method you used to activate testimonials.
After activating testimonials and publishing at least one, your site will automatically create a new page with your testimonials.
To view the new testimonials page, follow these steps:
- Visit your dashboard.
- Navigate to Posts → Categories.
- Hover over your testimonials category and click the “View” link.

Viewing the testimonial category this way allows you to see what your visitors will see. You’ll notice that the category URL is something like:
https://yourgroovysite.wordpress.com/category/testimonials
All of your testimonials will automatically appear on this page of your site in chronological order, with the most recent first. If you wish to change the order, you can adjust the date the testimonial was published in the post settings.

Themes that support the Site Editor can edit the layout of this page. To edit the layout of the default testimonial page, edit the All Archives template.
You can design your own testimonial page from scratch. Take the following steps to create a new page for your testimonials:
- Visit your site’s dashboard.
- Click on Pages on the left side.
- Click on the “Add new page” button.
- Optionally, choose a pre-defined page layout or click “Blank page” to create an empty page.
- Insert a Query Loop block and adjust one of the following settings to display your testimonials:
- If you’re using a testimonials category, select the testimonials category in the filters.
- If you’re using a custom post type, select “Testimonials” as the post type setting.
- Click the Publish button in the upper-right corner to make your page live.

You may add this page to your site’s menu for visitors to view your testimonials.
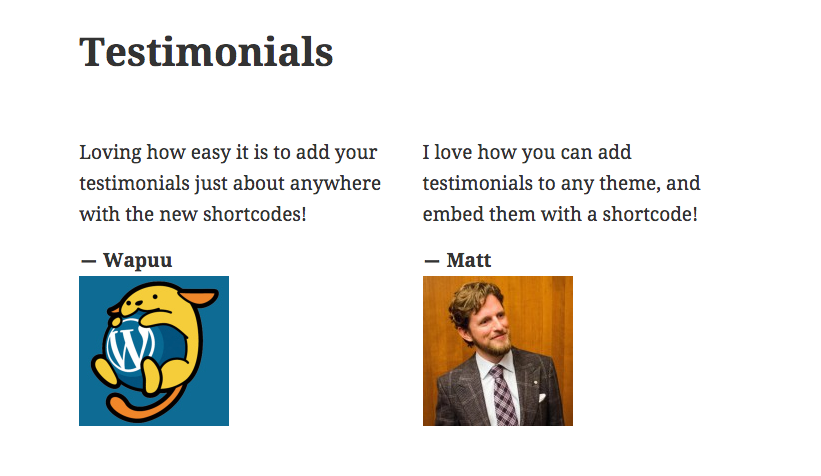
A less commonly used method for displaying testimonials on your site is through the use of shortcodes.
If you created a category for your site’s testimonials, you will use the shortcode. If you activated the custom post type for your site’s testimonials, you will use the [testimonials] shortcode.
Select the appropriate tab for the type of theme your site uses.
Add the display-posts shortcode to a post or page using the Shortcode Block. Use the category filter to display just the posts from your testimonial category.
In the following example, the category is set to testimonials, the content of the testimonial is included with the “true” value, and the image_size=”medium” will display the featured image in a medium size:
[display-posts category="testimonials" include_content="true" image_size="medium"]