Use headings to break up large blocks of text with scannable headlines, populate the table of contents, and help search engines understand your page structure. In this guide, you will learn how to add headings, choose the right heading level, format text, change colors, and add inline images.
Adding headings breaks up large blocks of text and helps visitors quickly understand your content structure. To add a heading to your page or post, follow these steps:
- From your site’s dashboard, edit the content you want to add the heading to.
- Click the + block inserter (plus icon) and search for “Heading”.
- Or, type /heading wherever you see “Type / to choose a block” to use a shortcut.
- Click the Heading block icon:

- Type your heading text in the new heading area.
- Tip: You can also use the AI option in the block toolbar to help generate heading text ideas. The AI option is represented by the sparkles icon.
- Click the Save or Publish button in the top-right of the editor.
For more information, visit our detailed instructions on adding blocks.
Headings follow a six-level hierarchy that ranks content by importance, with H1 being most important and H6 being least important.
To choose or change your heading level, follow these steps:
- Click on your Heading block.
- In the block toolbar that appears, click the heading level dropdown (shows H1, H2, H3, etc.).
- Select your desired heading level.
Using proper heading levels helps search engines understand your content structure. WordPress automatically assigns H1 to the title of your pages and posts. Therefore, your first heading on the page will be H2. H3 headings are subheadings. H4 headings are sub-subheadings, and so on.

Text formatting helps emphasize important words and creates visual hierarchy within your headings. To format text in your heading, follow these steps:
- Click on your Heading block.
- Highlight the specific text you want to format.
- Use the formatting options in the toolbar that appears:
- Bold button for bold text
- Italic button for italic text
- Link button to add hyperlinks
- Alignment buttons to align text left, center, or right
- More (down arrow) for additional formatting like:
- Footnote
- Highlight (Text color)
- Inline code
- Inline image
- Keyboard input
- Language
- Math
- Strikethrough
- Subscript
- Superscript
- Uppercase

Explore the block options (three dots) for more tools.
Adding color to your headings can help them stand out and match your site’s design. To change the overall appearance of your heading using block settings, follow these steps:
- Click on your Heading block.
- In the block settings sidebar, adjust the following settings:
You can also change the color or background of individual words within your heading. To change text or background colors for specific words in your heading, follow these steps:
- Click on your Heading block.
- Highlight the specific text you want to add color to.
- Click the More (down arrow) icon in the block toolbar that appears.
- Click Highlight.
- Choose your color from the options:
- Text: Changes the text color
- Background: Adds a colored background behind the text
- Click your desired color or use the color picker for custom colors.

Fit text is a typography setting that automatically scales your text to stretch across the full width of the space it’s in.
To enable fit text on a heading, follow these steps:
- Click on your Heading block.
- In the block settings sidebar, find the Typography section.
- Click the “Typography options” icon (three dots) and select the “Fit text” option.
- Toggle on the “Fit text” setting.

Your heading text will now stretch to match the full width of its container. As you resize your browser window or view the page on different devices, the text automatically scales to maintain that full-width appearance.
To disable fit text, return to the Typography settings and toggle off “Fit text“.
Inline images can add visual interest to your headings, such as icons or small graphics that complement your text. To add an inline image to your heading, follow these steps:
- Click on your Heading block.
- Place your cursor where you want the image to appear in your heading text.
- Click the More (down arrow) icon in the toolbar.
- Click Inline image.
- Select your image from the Media Library.
- Click Insert.
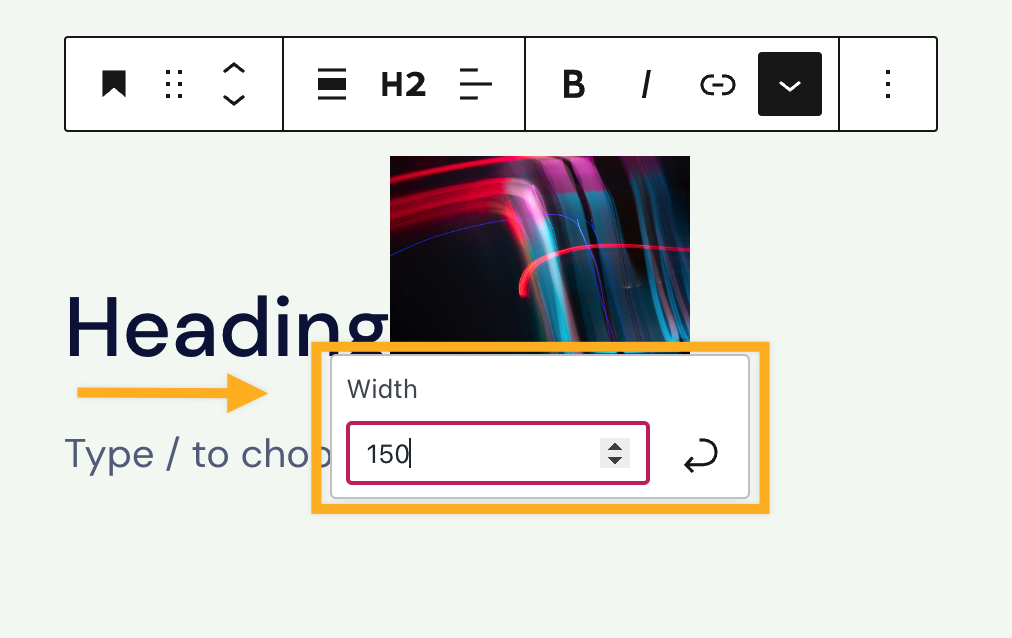
To resize your inline image:
- Click on the inline image within your heading.
- Enter a new width value in the field that appears.
- Click the curved arrow button to apply the changes.