If you would like to separate two blocks of content by a line, you can use the Separator block.
To add a Separator block, click on the + block inserter icon, search for the block, and click to add it.

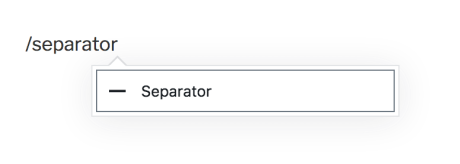
You can also type /separator and press enter in a new line to add one quickly.
For more information, visit our detailed instructions on adding blocks.
When you click on the block, a toolbar of options will appear:
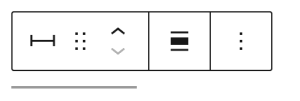
The Separator block has the following options:
- Change block type.
- Drag the block.
- Move the block up or down.
- Align to wide or full-width.
- More options.
When you select a block, you will find additional block settings in the right sidebar. If you do not see the sidebar, you may need to click the Settings icon in the top-right corner to bring up the settings. This icon looks like a square with two uneven columns:
In the Separator block settings, you can choose the HTML element that is applied to the separator. In most cases, you can leave this as the default option <hr>.
In the block settings sidebar, click on the Styles icon to access the design settings for the block. The Styles icon is in the shape of a circle, with half of the circle filled in:
On this tab, you can select one of the four separator styles: default (for your site’s theme), wide line (using the full content width), dots, and thin gray.

More details for these standard block styles can be found in the following guides:
For more information, visit our detailed instructions on Advanced Settings.
